
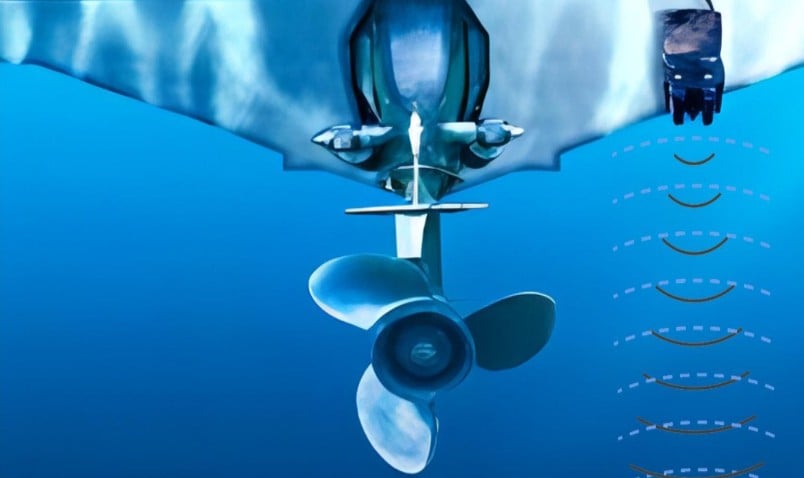
A transducer looks small. It does big work. This little device sends sound into the water and reads what bounces back. Your fish finder turns that echo into a picture.
Buy the wrong one, though, and your expensive display becomes useless. Blurry readings. Missed fish. Wasted money.
Most boaters pick a transducer the way they pick a snack at a gas station. Grab whatever’s cheap, hope it works. That backwards approach costs more in the long run.
This guide flips that order. You’ll learn what your boat actually needs first. Then you’ll know exactly what to buy.
Key Takeaways
- Your hull material decides your mounting options
- Frequency controls how deep you see and how sharp the image looks
- Boat speed changes which transducer style will actually perform
- Power and wattage affect depth range in murky or rough water
- A poor installation ruins even the best transducer on the market
Stick with us, and you’ll walk away knowing exactly what fits your boat, not what a random online review told you to buy.
Step 1: Know Your Hull Before You Shop
Skip this step and you’re guessing at everything else. Your hull decides what’s even possible.
Fiberglass Hulls
Fiberglass gives you the most flexibility. You can mount a transducer:
- Through the hull
- On the transom
- Inside the hull, known as shoot-through
Shoot-through sounds great on paper. No holes. No hardware in the water. But it does lose some signal strength compared to other methods.
This option only works well on solid fiberglass, without air pockets or stringers blocking the path.
Aluminum Hulls
Aluminum bounces sound differently than fiberglass does. Shoot-through mounting usually fails here.
Stick with:
- Transom mount
- Through-hull mount with a fairing block
A fairing block angles the transducer correctly on a V-shaped hull. Skip it, and your readings drift off no matter how good the unit is.
Inflatable and RIB Hulls
These need their own category of transducer. Look for models built for tube mounting or a transom bracket.
Some boaters prefer portable units that clip on and off. Handy if you switch boats often.
Not sure which mount fits your hull? Our marine electricians can walk your boat and tell you exactly what will work.
Step 2: Pick a Mounting Style That Fits
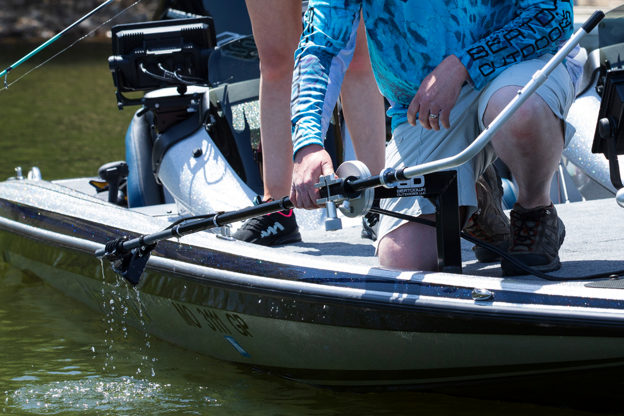
Every mounting style trades one thing for another. None of them wins at everything.
Transom Mount
The most common choice. Affordable. Simple to install. Works on most boats under 30 feet.
The downside shows up at speed. Turbulence near the transom scrambles the signal. Placement matters too. The unit needs to sit below the hull’s lowest point, clear of prop wash. A few inches off, and your readings suffer.
Through-Hull Mount
This one goes through a drilled hole and sits flush with the bottom.
Why boaters choose it:
- Stronger accuracy at higher speeds
- Cleaner signal overall
- Better performance in deep water
It takes careful work, though. A poor seal means a leak. Most owners should not attempt this one solo.
In-Hull or Shoot-Through Mount
No drilling. The unit gets glued inside the hull. Sound passes straight through solid fiberglass.
This stays the quietest option on the list. It does lose some strength compared to a through-hull setup.
Success here depends on the right epoxy and a bond with zero air bubbles. One trapped bubble blocks the signal completely.
Step 3: Understand Frequency Before You Buy
Frequency decides what shows up on your screen. This confuses almost everyone at first. Here’s the simple version.
Low Frequency, around 50 kHz
- Best for deep water
- Wide cone angle
- Less fine detail
- Suited for offshore and deep-sea trips
Think of it as a wide flashlight beam. It covers a lot of area but misses small detail.
High Frequency, around 200 kHz
- Best for shallow water
- Narrow cone angle
- Sharp, detailed images
- Suited for lakes and inshore fishing
This is the spotlight version. Less coverage, far more clarity.
Dual Frequency Units
Many transducers switch between both. You pick based on where you’re fishing that day. Costs more upfront, but gives real flexibility.
CHIRP Technology
CHIRP sweeps across a range of frequencies in a single pulse, instead of sending one tone at a time. The result is sharper images and better separation between fish close together.
If your budget allows, choose CHIRP. The upgrade pays off on the water.
Step 4: Match the Unit to Your Boat’s Speed
Speed matters more than most boaters realize. Fast hulls kick up turbulence. Turbulence creates bubbles. Bubbles block your signal entirely.
Boats Under 25 MPH
A standard transom mount handles this fine.
Boats Over 40 MPH
You need gear built for speed. Look for:
- Low-profile housings
- Stainless steel or bronze materials
- Through-hull or pod mounting
A pod mount pushes the transducer below the churned-up water near the hull. That keeps the signal clean even at full throttle. Tournament bass boats and offshore center consoles rely on this setup for exactly that reason.
Step 5: Check Power and Wattage
Higher wattage buys you:
- Deeper readings
- Faster response time
- Clearer images in murky water
Low-power units struggle once you hit deep or rough conditions. Offshore anglers should always buy more power than seems necessary on paper.
A rough rule some captain’s use: roughly 100 watts for every 100 feet of depth you want to read. Not exact science, but it keeps you from buying something underpowered.
Rough or murky water eats into your range too. A unit rated for 600 feet might realistically hit half that once the water gets choppy.
Step 6: Confirm It Works with Your Display
Not every transducer pair with every fish finder. Compatibility trips up a lot of buyers.
Check before you purchase:
- Connector type
- Brand match, since Garmin, Lowrance, and Humminbird often use their own plugs
- Frequency range your display actually supports
Mixing brands creates headaches fast. Stick with what the manufacturer recommends whenever you can.
Some displays also unlock features like side imaging or down imaging only with a matching transducer. Buy the wrong one, and you lose tools you already paid for.
Mistakes That Cost Boaters Money
- Buying on Price Alone: Cheap units often give inaccurate readings.
- Ignoring Hull Material: The wrong mount style ruins your performance from day one.
- Skipping Professional Installation: A bad seal or wrong angle wastes the whole purchase.
- Forgetting about Speed: Fast boats need speed-rated gear, full stop.
- Choosing the Wrong Frequency: Shallow-water anglers rarely need a low-frequency unit.
- Mounting too Close to the Prop: This causes constant interference.
Most of these mistakes come down to rushing the purchase or skipping research. Slow down, and you avoid nearly all of them. The same logic applies across your boat’s systems. Regular checks, like marine AC maintenance, catch small issues before they become expensive repairs.
Why Professional Installation Actually Matters
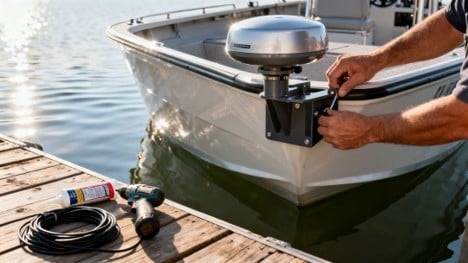
A transducer only performs as well as its install.
Bad installs cause:
- Air bubbles trapped under the hull
- Wrong mounting angle
- Leaks through a poorly sealed hole
- Electrical interference from nearby wiring
Even a one-degree tilt throws off your readings, and most boaters can’t spot that problem just by eyeballing the unit.
Our team at Zisser Marine handles marine electrical installations every week. We understand how wiring, grounding, and mounting angle all affect sonar accuracy, down to the degree.
Thinking about solar power for your boat too? Check out our solar power solutions for boats to keep your electronics running without draining the battery bank.
Keeping Your Transducer in Good Shape
- Clean the face often. Algae and barnacles block the signal fast.
- Check wiring connections each season. Corrosion kills signal strength quietly.
- Inspect the mounting angle after rough-water trips.
- Skip harsh chemicals on the transducer face.
- Store the boat properly in the off-season to prevent cracking.
A quick seasonal check catches small problems before they turn into expensive ones. If you boat somewhere with cold winters, pair this with your boat’s winterizing electrical checklist to protect every system before the season turns.
Final Thoughts on Choosing the Right Transducer
Your decision comes down to four things:
- Hull type
- Mounting style
- Frequency needs
- Boat speed
Get these right, and every trip gives you clear, accurate readings. Guessing wastes money. A proper setup gives you better fishing, safer navigation, and one less thing to worry about on the water.
Frequently Asked Questions (FAQs)
What’s the Best Transducer Frequency for Freshwater Fishing?
High frequency, around 200 kHz, works best. It delivers sharp detail in shallow lakes and rivers.
Can I Install a Transducer Myself?
You can, but mistakes happen often. A wrong angle or weak seal causes bad readings or leaks. Professional installation avoids both.
Do Saltwater Boats Need a Different Transducer?
Not always, but saltwater setups often call for stainless steel or bronze housings to resist corrosion over time.
Is CHIRP Sonar Worth the Extra Cost?
Usually, yes. CHIRP sends multiple frequencies at once, giving you clearer images and better fish separation than standard sonar.
Will Any Transducer Work with Any Fish Finder?
No. Brands often use different connectors and software. Always confirm compatibility before you buy.
How Often Should a Boat’s Transducer Be Replaced?
Most units last 5 to 10 years with good care. Replace sooner if readings go blurry or you notice physical damage.
When It’s Time to Call a Pro
Transducers look simple from the outside. A sensor, some wires, a display. But getting the sizing, mounting, and wiring right takes real experience.
Wrong frequency wastes your budget. Poor mounting creates leaks. Mismatched gear leaves you staring at a blank screen offshore.
Zisser Marine specializes in marine electrical repair, maintenance, and upgrades. Our team picks the right transducer for your hull, mounts it correctly, and wires it to marine safety standards.
We handle the technical side. You get clear, reliable readings on the water.
Ready to find the right transducer for your boat? Contact Zisser Marine today for a custom sonar assessment.